Borrowed from: support.populiweb.com
Personal account settings – Populi Knowledge Base
5-6 minutes
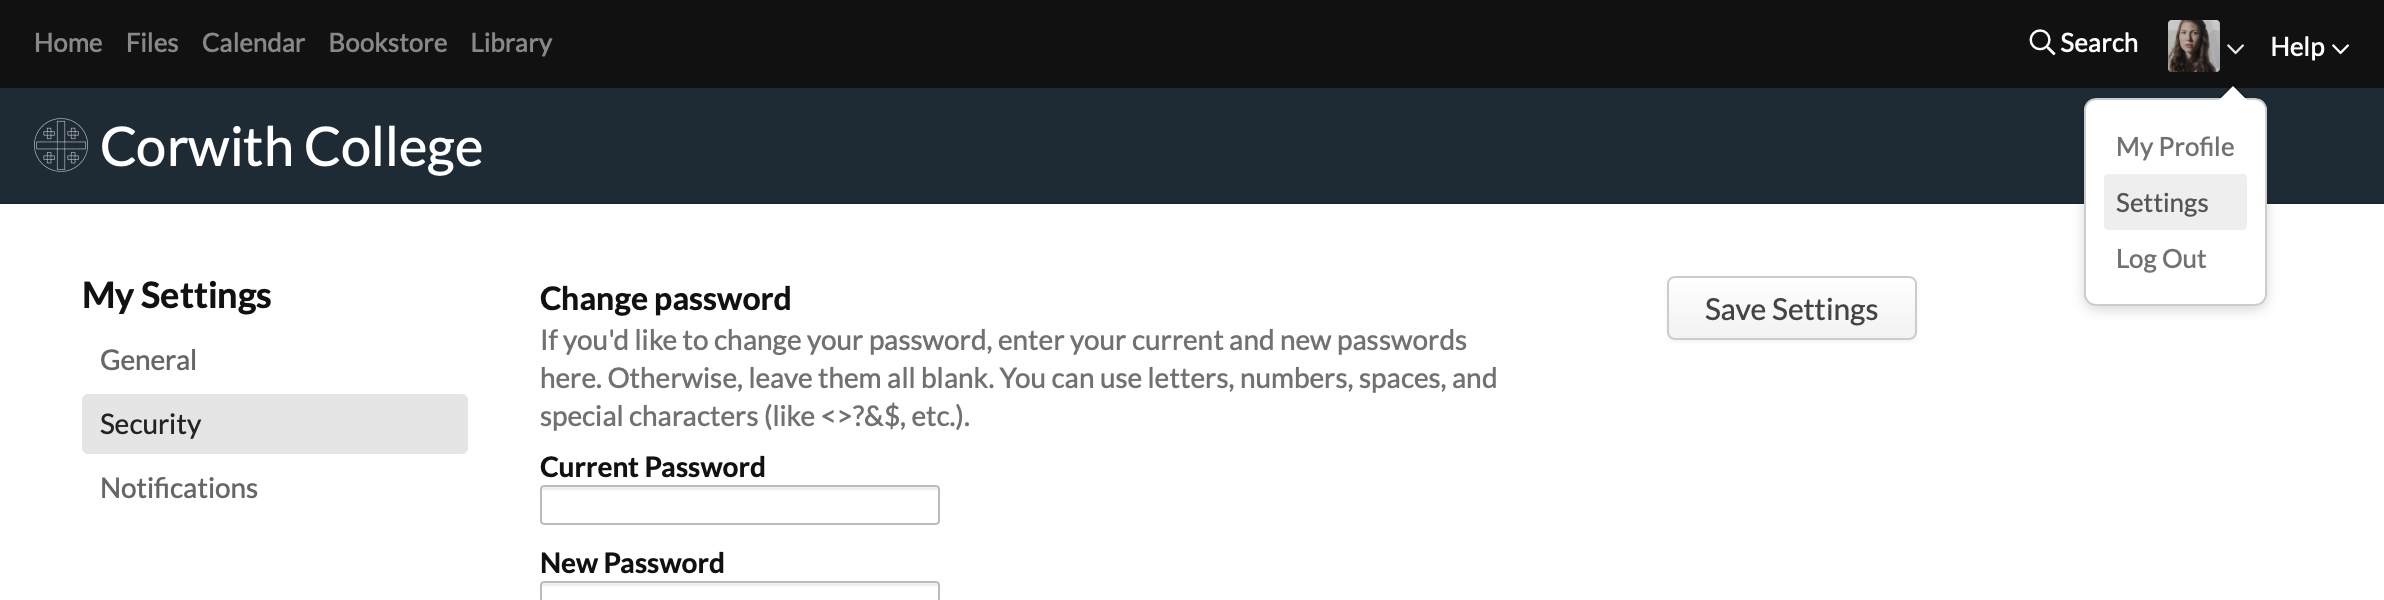
Your personal settings let you control a number of features and functions in your Populi user account. To get there, click your name in the black bar in the upper right of the Populi screen (right next to the orange Help button) and select Settings.
General settings
In addition to settings that control your timezone, profile privacy, and birthday announcements, staff and faculty users can set up an email dropbox and specify activity feed visibility.
Email dropbox
If you have the Staff or Faculty user role, you can use your dropbox to copy emails to a person's activity feed. This article has all the details.
Default activity feed visibility
When you post items to activity feeds (or send them there using your dropbox), you can select the user roles to which that item will be visible. In this settings, you can set up your default selections for item visibility so you don't have to re-check them each time you post. For example, a Student Billing user might want to ensure that everything she posts is visible to Financial Admin and Financial Aid users. Even after setting up your default, you can still adjust the visibility for any individual item you post. Emails sent from outside Populi to your dropbox will use your default visibility settings.
Security
Your security settings help you control access to your Populi login.
Reset password
To reset your password, enter your current password, your new one, and then confirm the new. The new password will be required next time you log in.
Login Approvals
Login approval is a security measure that helps protect your Populi user account by requiring an extra login "factor"—in this case, a passcode sent to your mobile phone. Here's how it works:
- You set up a verified text messaging number (or you use the one you've already set up).
- You log in to Populi using a new browser or using a new device (phone, iPad, a new computer, etc.).
- Populi sends a one-time use passcode to your mobile phone.
- You enter the code to finish logging in.
- That device (or browser) is now "recognized". That means that it will not require a passcode for future logins (just your username and password).
Your school may either allow or require you to use login approval.
- If allowed, you'll see a checkbox that enables login approval. Remember to set up a verified text notification number if you haven't yet!
- If required, you'll see a notice to that effect.
Recognized Devices
Recognized devices are created whenever you log in to Populi on a new browser or device (a computer, phone, or tablet). This section lets you manage your devices.
- Devices are automatically added whenever you log in on a new one for the first time (whether or not you use login approvals).
- Unique devices are created for each different browser or computer on which you log in to Populi. For example, you may use both Safari and Chrome on your Macbook Pro—each browser would be considered a unique device. Likewise, if you're using the Populi iOS app on your iPhone and then log in using the iPhone's built-in Safari browser, each would be considered a unique device.
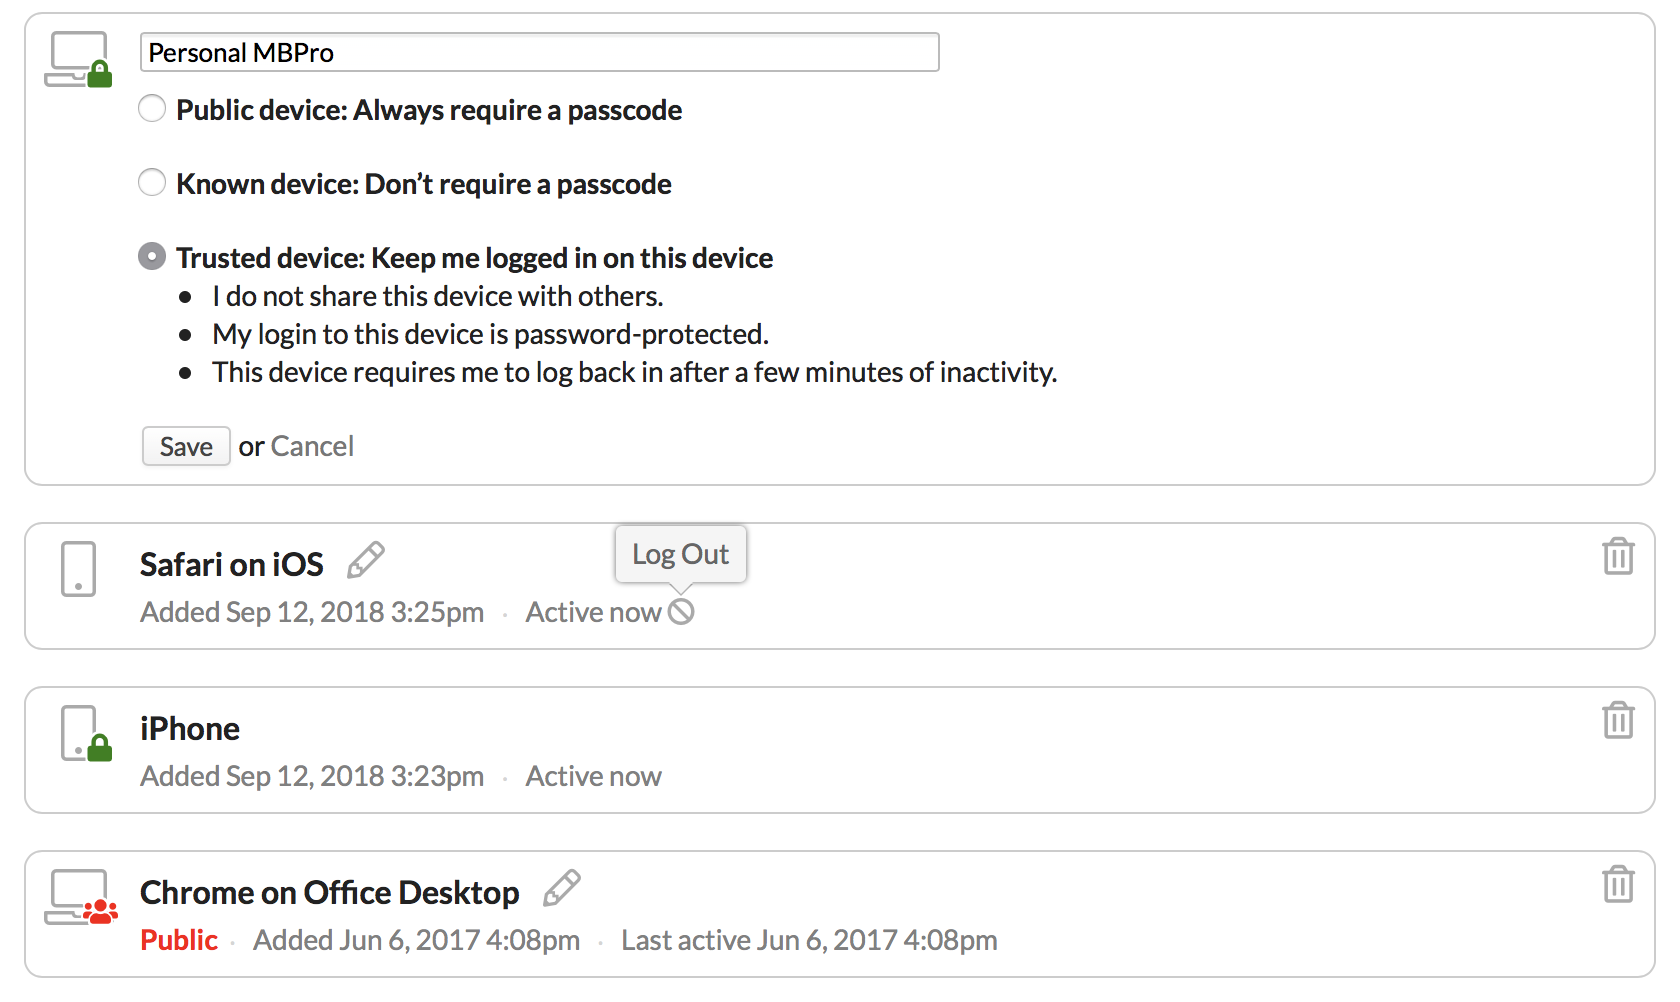
- Click to edit a device. You can change its name mark it with one of the three trust settings:
- Known devices let you log in whenever you wish without a passcode. That is, you need only your username and password to access Populi on this device.
- Public devices require a passcode every time you log in. If you ever use Populi on any sort of shared computer, you should mark it this way.
- Trusted devices let you remain logged in to Populi—you don't even have to enter your username and password to access Populi on this device. Please take special care with such devices! You should not share it, it should enter "Sleep" mode after a few minutes of inactivity, and should require a password when you start it or wake it up.
- Never set a public computer to trusted!
- If you lose access to a device, click to deauthorize it.
Notifications
Here you'll set up your verified text notification number and email address. You'll also opt-in (or opt-out) to the reminders and other notifications you wish to receive.
Text notification number and email notification address
To receive notifications—which include everything from emergency notices to login approval passcodes to reminders and updates, you'll need to have a verified text notification number and/or email address. You can read about how to set those up in this article.
After verifying your text number and email address, you can opt-in to the various notifications in the list below.
Have more questions? email support@cbts.edu